Quantcast
Channel: Veeam Support Knowledge Base
Viewing all 4508 articles
Browse latest View live

How to Use Existing Veeam Backup & Replication PostgreSQL instance for Veeam Backup for Microsoft 365 Deployment

$
0
0

How to Use Existing Veeam Backup & Replication PostgreSQL instance for Veeam Backup for Microsoft 365 Deployment

KB ID: 4638
Product: Veeam Backup for Microsoft 365 | 8
Published: 2024-09-03
Last Modified: 2024-11-07
Article Applicability

This article documents issues that occur when installing Veeam Backup for Microsoft 365 v8 or higher on the same server as an existing Veeam Backup & Replication v12 or higher deployment that is using the included local PostgreSQL instance.

The errors described may also occur in other scenarios, as they are generic connection errors. This article is strictly relevant to the scenario described.

Challenge

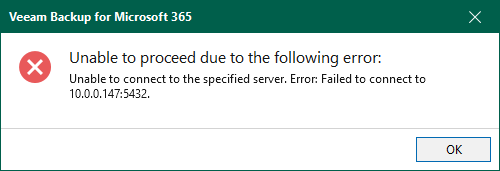
When attempting to install Veeam Backup for Microsoft 365 on a machine where Veeam Backup & Replication is already installed, and that deployment of Veeam Backup & Replication is using the included local PostgreSQL Instance, the Veeam Backup for Microsoft 365 installer fails with the error:

Unable to proceed due to the following error:
Unable to connect to the specified server. Error: Failed to connect to: <IP>:<port>.
When postgres.conf contains listen_addresses = 'localhost'

Other less common but possible errors are:

  • Unable to proceed due to the following error:
    Unable to connect to the specified server. Error: 28000: no pg_hba.conf entry
    for host "<IP>", user " postgres", database "postgres",
    no encryption.
    
  • Unable to proceed due to the following error:
    Unable to access PostgreSQL server using SQL authentication. SQL
    authentication is required by backup proxies. Please enable it on the
    PostgreSQL server.
    

Cause

This issue occurs because the Veeam Backup for Microsoft 365 installer has detected the existing local PostgreSQL instance. However, the configuration settings applied to PostgreSQL by Veeam Backup & Replication are incompatible with those required by Veeam Backup for Microsoft 365.

Configuration conflicts:

  • Veeam Backup & Replication configures PostgreSQL to listen only for local connections.
    Veeam Backup for Microsoft 365 requires that PostgreSQL listen for remote connections from its proxies.
  • Veeam Backup & Replication does not configure PostgreSQL to allow remote access.
    Veeam Backup for Microsoft 365 requires that PostgreSQL allow remote connections so that its Proxies can access the configuration database using a dedicated read-only account using password-based authentication.

Solution

Windows-based PostgreSQL Deployment

The instructions provided below are specifically for a Windows-based PostgreSQL deployment. This is because the article explains how to configure the PostgreSQL instance deployed by Veeam Backup & Replication (VBR), enabling Veeam Backup for Microsoft 365 to connect to it.

If you are planning to deploy Veeam Backup for Microsoft 365 using a remote dedicated PostgreSQL instance (which may or may not also be used by VBR), that configuration is beyond the scope of this article. For such a setup, you should create a dedicated superuser account and use it during the deployment of Veeam Backup for Microsoft 365. After deployment, consult the Veeam Backup for Microsoft 365 User Guide for details on Adjusting PostgreSQL Instance Configuration.

To enable Veeam Backup for Microsoft 365 and Veeam Backup & Replication to share an existing local PostgreSQL instance, you must modify several PostgreSQL configuration files as described below.

Part 1: Stop Veeam Backup & Replication Tasks and Services

  1. Ensure all tasks within Veeam Backup & Replication are stopped.
  2. Stop all Veeam services:
Get-Service Veeam* | Stop-Service -Force

Part 2: Modify PostgreSQL Configuration Files

The default location for all PostgreSQL Configuration Files is:
C:\Program Files\PostgreSQL\15\data\

  1. Edit postgresql.conf and find the setting 'listen_address' and update the line to be:
listen_addresses = '*'
  1. Edit pg_hba.conf and add the following to the bottom of the file:
# non-localhost host with user 'postgres' and SSPI
host all postgres 0.0.0.0/0 sspi map=veeam
host all postgres ::/0 sspi map=veeam
# non-localhost host with user 'all' and password
host all all 0.0.0.0/0 scram-sha-256
host all all ::/0 scram-sha-256
  1. Edit pg_ident.conf and ensure that at the bottom of the file there are:
    Note: Usernames are entered into this conf file in UPN format.
    1. An entry for:
      veeam   "SYSTEM@NT AUTHORITY"   postgres
      
      Note: The SYSTEM@NT AUTHORITY account naming is OS-locale dependent. If using an OS with a language other than English, check and use the appropriate value. Mouseover here for PowerShell Script to check.(New-Object System.Security.Principal.SecurityIdentifier("S-1-5-18")).Translate([System.Security.Principal.NTAccount]).Value
    2. An entry for the user account you will use to install Veeam Backup for Microsoft 365.
      • Domain Account Example:
        veeam   user@DOMAIN   postgres
        
      • Local Account Example:
        veeam   user@HOSTNAME   postgres
        
  2. Restart the PostgreSQL Service to apply the changes.
Restart-Service -Name "postgresql*"

Part 3: Start Veeam Backup & Replication Service and Reattempt Veeam Backup for Microsoft 365 Install

  1. Start the Veeam services:
Get-Service Veeam* | Start-Service
  1. Reattempt the Veeam Backup for Microsoft 365 install.

More Information

To submit feedback regarding this article, please click this link: Send Article Feedback
To report a typo on this page, highlight the typo with your mouse and press CTRL + Enter.

NATS Server Configuration Advice for Use With Veeam Backup for Microsoft 365

$
0
0

NATS Server Configuration Advice for Use With Veeam Backup for Microsoft 365

KB ID: 4675
Product: Veeam Backup for Microsoft 365 | 8
Published: 2024-11-07
Last Modified: 2024-11-08

Purpose

This article provides advice for optimizing NATS Server configuration when used in conjunction with Veeam Backup for Microsoft 365.

Solution

When Veeam Backup for Microsoft 365 is deployed using the included NATS Server, the system variable 'GOMEMLIMIT' is set to 30% of the total system memory available at the time of installation.

Customers who choose to use an existing NATS Server are advised to closely monitor memory usage and consider instituting a similar memory limit to prevent Veeam Backup for Microsoft 365 from causing NATS Server to consume excessive memory.

More Information

Additional NATS Server Configuration Considerations

  • Since the GOMEMLIMIT value is a fixed value, any changes to the amount of system memory should be followed by an adjustment to the GOMEMLIMIT value. For the NATS Server deployed by the Veeam Backup for Microsoft 365 installer, this value is stored as a environmental variable"C:\Windows\system32\rundll32.exe" sysdm.cpl,EditEnvironmentVariables and should consistently be set to 30% of the total system memory.

    Note: For deployments on virtual machines with dynamic memory allocation (e.g., Hyper-V), the GOMEMLIMIT value may be set considerably lower than expected if the allocated memory was small during the initial deployment of Veeam Backup for Microsoft 365.
gomemlimit
To submit feedback regarding this article, please click this link: Send Article Feedback
To report a typo on this page, highlight the typo with your mouse and press CTRL + Enter.

Veeam Backup for Salesforce Built-In Updater Not Finding Updates

$
0
0

Veeam Backup for Salesforce Built-In Updater Not Finding Updates

KB ID: 4684
Product: Veeam Backup for Salesforce | 1.0
Published: 2024-11-08
Last Modified: 2024-11-08

Challenge

In Veeam Backup for Salesforce v1, the Updater displays no updates available despite the fact that newer versions are available.

Cause

The updater fails to identify new updates as being available because of an expired or incorrect GPG key used to verify package integrity. Without the proper GPG key, the package manager cannot authenticate or apply updates correctly, resulting in errors during update attempts.

When this occurs, the Veeam-updater.log will contain the following error:

Service.CheckUpdates: Cannot find any updates for VBSF repository (<guid>): packageManagerErrorFailedGetList veeam-repo exit code: 1, timeout exceeded: false, output: , errors: Error: Failed to download metadata for repo 'veeam-repo': repomd.xml GPG signature verification error: Bad GPG signature
Error: Failed to download metadata for repo 'veeam-repo': repomd.xml GPG signature verification error: Bad GPG signature

Solution

Use the following scripts to switch to the correct GPG key:

For RPM-Based Systems (ex:RHEL)

  1. Download the script:
curl -O https://repository.veeam.com/yum/el/8/x86_64/update-gpg-vbsf-v1.sh
  1. Run the script:
sudo bash update-gpg-vbsf-v1.sh
  1. Check for updates once again via Veeam Backup for Salesforce Updater.

For DEB-Based Systems (ex:Ubuntu)

  1. Download the script:
curl -O https://repository.veeam.com/apt/stable/amd64/update-gpg-vbsf-v1.sh
  1. Run the script:
sudo bash update-gpg-vbsf-v1.sh
  1. Check for updates once again via Veeam Backup for Salesforce Updater.

More Information

Newer versions of Veeam Backup for Salesforce handle updating the repo GPG keys more effectively, which is why this issue eclusively affects Veeam Backup for Salesforce version 1.

To submit feedback regarding this article, please click this link: Send Article Feedback
To report a typo on this page, highlight the typo with your mouse and press CTRL + Enter.

How to Move Veeam Backup for Microsoft 365 to a New Server

$
0
0

How to Move Veeam Backup for Microsoft 365 to a New Server

KB ID: 2649
Product: Veeam Backup for Microsoft 365 | 7.0 | 7a | 8
Published: 2018-05-07
Last Modified: 2024-09-17

Purpose

This article documents the procedure for moving resources assigned to a Veeam Backup for Microsoft 365 server installation to a new Veeam Backup for Microsoft 365 server.
At this time, there is no way to export the configuration of Veeam Backup for Microsoft 365. As such, all organizations and jobs will have to be recreated on the new server. If the steps below are performed correctly, the first run on the new server will be "incremental." The UI will show that a full is occurring, but only incremental data will be transferred.

Requirements

Server Specific

  • The new Veeam Backup for Microsoft 365 server should have the same or newer version of the Microsoft Windows OS.
  • A copy of the Veeam Backup for Microsoft 365 license will be needed during installation.

Repository Specific Considerations

  • If the existing backup repository is a network share, the new server must have access to that share.
  • If the existing backup repository is an iSCSI drive,  it must be disconnected from the original server first (to avoid the two iSCSI initiators issue), then connect the iSCSI drive to the new server.
  • If the backup repository is object storage, then the new server can have any Windows OS version supported by Veeam Backup for Microsoft 365. The list of supported OS versions is in this article under the OS specification.   
  • Repositories containing data backed up using protected APIs can only be moved between proxies that have protectedAPIs enabled.

Solution

Veeam Backup for Microsoft 365 v8
  1. Install Veeam Backup for Microsoft 365 on the new server and add remote proxies (if needed).
  2. Add the same Microsoft 365 organization on the new server.
  3. Add the same Object Storage account to the new server.
  4. Delete backup jobs and copy jobs or set them to a different target repository.
  5. Make sure that the backup repository is removed from the configuration.
  6. (Optional) To migrate local backup storage, copy the backup repository data to the backup repository location on the new server.
    Note: Backup proxy server and Veeam Backup for Microsoft 365 server must be deployed within the same domain or within trusted domains.
  7. Add the backup repository (from a new location).
  8. (For OSR only) If you see the “Cannot override repository ownership because the object storage repository is locked” message and you can no longer access the original server, navigate to the corresponding bucket/container and delete the object inside the RepositoryLock folder.
    Refer to this article for information on the structure of the Veeam Backup for Microsoft 365 object storage repository and how to locate the RepositoryLock folder.
  9. (For OSR only) The created backup repository will be marked as Out of Sync, meaning that the metadata needs to be synchronized from the bucket/container to the persistent cache.
    Click Yes to start synchronization immediately.
    Alternatively, the persistent cache folder can be synchronized manually, as described in this article.
  10. Restore Points created on the original Veeam Backup for Microsoft 365 server can be accessed by right-clicking the corresponding organization.
  11. Run a test restore from the organization using a restore point created on the original Veeam Backup for Microsoft 365 server to verify that you can recover data.
Veeam Backup for Microsoft 365 7 / 7a

There are two migration procedures listed below, which one you use will be depend on whether an object storage repository is in use.

Migrate Veeam Backup for Microsoft 365 Server without an Object Storage Repository

  1. Install the same or newer version of the Microsoft Windows OS on the new server.
  2. Install Veeam Backup for Microsoft 365 on the new server.
  3. Stop all the Veeam Backup for Microsoft 365 services on the original server, before moving any data.
  4. Copy the backup repository data to the backup repository location on the new server.
  5. Add the same Microsoft Office 365 organization on the new server.
  6. (Optional) Add a backup proxy from the original site to the new server:
    1. Stop all backup jobs that are running on the proxy.
    2. Open backup job settings and specify to use another proxy.
    3. Remove the proxy from the original Veeam Backup for Microsoft 365 console.
    4. Add the proxy to the new Veeam Backup for Microsoft 365 server.

      Note: Backup proxy server and Veeam Backup for Microsoft 365 server must be deployed within the same domain or within trusted domains.
  7. Add the backup repository (from a new location).
  8. Restore Points created on the original Veeam Backup for Microsoft 365 server can be accessed by right-clicking the corresponding organization.
  9. Run a test restore from the organization using a restore point created on the original Veeam Backup for Microsoft 365 server to verify that you can recover data.

Migrate Veeam Backup for Microsoft 365 Server - with an Object Storage Repository

  1. Before decommissioning the original server, make sure that the backup repository is removed from the configuration.
  2. Build the new server using any supported Windows OS version from the list in this article under the OS specification.
  3. Install Veeam Backup for Microsoft 365 or remotely deploy Veeam Backup for Microsoft 365 proxy on the new server.
  4. Add the same storage account to the new server.
  5. If you see the “Cannot override repository ownership because the object storage repository is locked” message and you no longer have access to the original server, navigate to the corresponding bucket/container and delete the object inside the RepositoryLock folder.
    Refer to this article for information on the structure of the Veeam Backup for Microsoft 365 object storage repository and how to locate the RepositoryLock folder.
  6. Create a new backup repository and extend it with the needed storage account.
  7. The created backup repository will be marked as Out of Sync, meaning that the metadata needs to be synchronized from the bucket/container to the persistent cache folder on a local disk.
    Click Yes to start synchronization immediately.
    Alternatively, the persistent cache folder can be synchronized manually as described in this article.
  8. Add the same Microsoft Office 365 organization to the new server.
  9. Run a test restore from the organization using a restore point created on the original Veeam Backup for Microsoft 365 server to verify that you can recover data.

Migration of a remote proxy to another host (Optional)

  1. Stop all backup jobs that are using the remote proxy.
  2. For each backup job using the remote proxy that will be migrated, open backup job settings and specify to temporarily use a different repository (i.e. Default backup repository).
  3. Remove all local repositories that will be migrated from the Veeam Backup for Microsoft 365 console.
    *If an Object Storage Repository is used by the proxy, follow the steps in the Migration of Veeam Backup for Microsoft 365 with an object storage repository procedure.
  4. (Optional) Remove the original remote proxy from the Veeam Backup for Microsoft 365 console.
  5. Move the repository data from the original proxy to the new proxy.
    *(Skip this step for SMB Repositories)
  6. Add the new remote proxy in the Veeam Backup for Microsoft 365 console.
  7. Add the migrated repository to the new backup proxy.
  8. Edit backup job from Step 2 and reconfigure them to use the repository added from the new proxy location.
  9. Start the original proxy service if it was stopped.
Note: Restore points from the original Veeam Backup for Microsoft 365 server are available as soon as the organization is added to the console.
To submit feedback regarding this article, please click this link: Send Article Feedback
To report a typo on this page, highlight the typo with your mouse and press CTRL + Enter.

Veeam Backup for Microsoft 365 Modern App-Only Authentication Limitations

$
0
0

Veeam Backup for Microsoft 365 Modern App-Only Authentication Limitations

KB ID: 3146
Product: Veeam Backup for Microsoft 365 | 7.0 | 7a | 8
Published: 2020-06-04
Last Modified: 2024-09-17

Information

Veeam Backup for Microsoft 365 v8 and higher

Due to Microsoft's deprecation of Basic Authentication, the only option available when adding a new Microsoft 365 organization to Veeam Backup & Replication v8 is Modern App-Only Authentication.


Veeam Backup for Microsoft 365 v7 and v7a

When adding a Microsoft 365 organization with Modern Authentication to Veeam Backup for Microsoft 365, there is an option to enable "Allow for using legacy authentication protocols." When this checkbox is not selected, Veeam Backup for Microsoft 365 will use a mode referred to as Modern App-Only Authentication.

Due to Microsoft's deprecation of Basic Authentication, all organizations must be added to Veeam Backup for Microsoft 365 using Modern App-Only Authentication. For more information review: KB4365: Support Statement - Exchange Online Basic Authentication Deprecation

Modern App-Only Authentication Limitations

Veeam Backup for Microsoft 365 v8 and higher

Backup

  • SharePoint Web Parts can only be backed up if their ‘exportmode’ property is enabled. Non-exportable Web Parts are not supported. To prevent issues processing WebParts, review and implement the solution documented in KB4091.

Restore

  • OneNote restore is not supported.
  • SharePoint Web Part customized template cannot be preserved upon a restore. All Web Parts will be restored with the default template.
  • The ‘Allow multiple responses’ setting in survey lists within team modern sites is not preserved upon a restore.

PowerShell

Veeam Backup for Microsoft 365 v7 and v7a

Backup

Restore

  • OneNote restore is not supported.
  • SharePoint Web Part customized template cannot be preserved upon a restore. All Web Parts will be restored with the default template.
  • The ‘Allow multiple responses’ setting in survey lists within team modern sites is not preserved upon a restore.

PowerShell

More Information

For a complete list of considerations and known limitations of Veeam Backup for Microsoft 365, review: Considerations and Limitations
To submit feedback regarding this article, please click this link: Send Article Feedback
To report a typo on this page, highlight the typo with your mouse and press CTRL + Enter.

Build Numbers and Versions of Veeam Backup for Salesforce

$
0
0

Build Numbers and Versions of Veeam Backup for Salesforce

KB ID: 4372
Product: Veeam Backup for Salesforce | 1.0 | 2.0 | 2.1 | 3.0
Published: 2022-10-27
Last Modified: 2024-09-18

This KB article lists all versions of Veeam Backup for Salesforce and their respective build numbers.

For more information on downloading the latest version of Veeam Backup for Salesforce, visit:

Version Build Number Release Date Release Notes
Veeam Backup for Salesforce 3 Releases
Veeam Backup for Salesforce 3 3.0.0.1769 2024-09-18 HTML
Veeam Backup for Salesforce 2.1 Releases
Veeam Backup for Salesforce 2.1 2.1.0.4675 2023-11-27

HTML

KB4502

Veeam Backup for Salesforce 2 Releases
Veeam Backup for Salesforce 2 2.0.0.3955 2023-08-30 HTML
Veeam Backup for Salesforce 1 Releases
Veeam Backup for Salesforce 1 P20230222 1.0.2.1992 2023-02-22 KB4417
Veeam Backup for Salesforce 1 1.0.0.1429 2022-10-27 PDF
Swipe to show more of the table
To submit feedback regarding this article, please click this link: Send Article Feedback
To report a typo on this page, highlight the typo with your mouse and press CTRL + Enter.

How to Re-Initialize Veeam Backup for Salesforce Configuration Database Connection

$
0
0

How to Re-Initialize Veeam Backup for Salesforce Configuration Database Connection

KB ID: 4370
Product: Veeam Backup for Salesforce | 2.0 | 2.1 | 3.0
Published: 2022-10-27
Last Modified: 2024-09-18

Purpose

This article documents how to change which account Veeam Backup for Salesforce uses to connect to its configuration database.

Solution

Scenario 1: Change Database Credentials When Existing Connection is Functioning

This scenario assumes the current connection to the database is valid and that you are simply updating user credentials.

  1. Create a new DB username/password in PostgreSQL. 
  2. Grant that user permissions for the configuration database and schema.
  3. Within Veeam Backup for Salesforce, click Configuration, switch to the Salesforce section, then switch to the Database tab. 
  4. In the top-right of the Database tab, click the Configuration Database button.
  5. Provide the new database username and password, and then click save.
    The new user will be saved, and the connection will be re-established.

Scenario 2: Change Database Credentials When Existing Connection Is Unavailable

This scenario assumes there is no access to the Veeam Backup for Salesforce interface since the database connection is unavailable.

Note: Steps 1 and 4 are version-specific. All other steps are the same between versions of Veeam Backup for Salesforce.

  1. SSH into the server and navigate to:
    • For Veeam Backup for Salesforce v2:
      /opt/vbsf/vbsf-backend/
      
    • For Veeam Backup for Salesforce v3
      /opt/vbsf/vbsf-backend/config
      
  2. Delete the following files:
    • local.mv.db
    • local.trace.db
    • persistence-db.properties
    • init.properties
  3. Restart the backend service.
sudo systemctl restart vbsf-backend
  1. Get the access token:
For Veeam Backup for Salesforce v2
sudo cat /opt/vbsf/vbsf-backend/init.properties | grep firstuser.token
For Veeam Backup for Salesforce v3
sudo cat /opt/vbsf/vbsf-backend/config/init.properties | grep admin.password.set.token | cut -d'=' -f2 
  1. In a browser, open the Veeam Backup for Salesforce URL with the access token from above.

    Example:

https://<vbsf_server_address>/?access_token=<access token>
  1. Follow the wizard and create a local administrator user password.
  2. On the Connect to PostgreSQL step, choose "Existing Installation" and provide the connection credentials.
To submit feedback regarding this article, please click this link: Send Article Feedback
To report a typo on this page, highlight the typo with your mouse and press CTRL + Enter.

Error occurred during certificate processing. — Upgrade Veeam Backup Enterprise Manager Error

$
0
0

Error occurred during certificate processing. — Upgrade Veeam Backup Enterprise Manager Error

KB ID: 4660
Product: Veeam Backup & Replication | 12.2
Published: 2024-09-18
Last Modified: 2024-09-18

Challenge

When attempting to upgrade an existing Veeam Backup Enterprise Manager deployment to version 12.2, the installer fails, displaying the error:

Error occurred during certificate processing.
Error

Cause

This error occurs when the TLS certificate used for REST API doesn't specify a certificate store name. 

Solution

Part 1: Review TLS Certificate

Review the existing TLS certificate and identify if the Certificate Store Name value is (null) using the following command:

netsh http show sslcert ipport=0.0.0.0:9398
Null Cert Store The (null) 
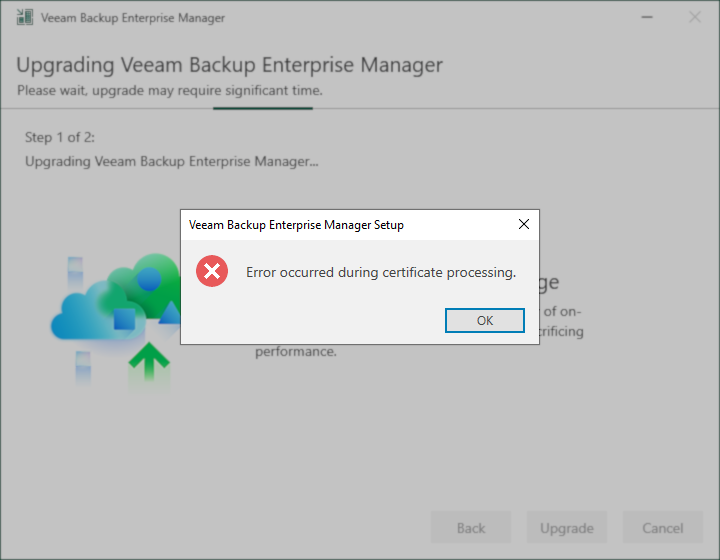
value for the Certificate Store Name causes the upgrade error.

Part 2: Remove and Rebind Certificate

If the Certificate Store Name is listed as (null), you must rebind the existing TLS certificate so that it has the Certificate Store Name explicitly specified.

  1. Review the existing certificate and take note of the Certificate Hash value.
netsh http show sslcert ipport=0.0.0.0:9398
check cert
  1. Remove the existing certificate.
netsh http delete sslcert ipport=0.0.0.0:9398
remove cert
  1. Using the Certificate Hash value you noted from step 1, rebind the existing certificate, specifying the Certificate Store as My.
netsh http add sslcert ipport=0.0.0.0:9398 certhash=<hash> appid="{73ec9393-95b6-4498-a845-9a0cb95306be}" certstorename=My
readd cert

Part 3: Complete Veeam Backup Enterprise Manager Upgrade

After the upgrade of Veeam Backup Enterprise Manager (VBEM) fails, the installer will not offer the option to upgrade it. Therefore, after repairing the certificate issue, you'll need to use the Install Veeam Backup Enterprise Manager option and during the installation have it use the existing configuration database. If VBEM and Veeam Backup & Replication (VBR) are installed on the same machine, you must first upgrade VBR, and then install VBEM.

  1. Run `Setup.exe` from the Veeam Backup & Replication install media.
  2. [If VBR and VBEM are installed on the same machine.] Upgrade Veeam Backup & Replication.
  3. Install Veeam Backup Enterprise Manager.
To submit feedback regarding this article, please click this link: Send Article Feedback
To report a typo on this page, highlight the typo with your mouse and press CTRL + Enter.

How to use Azure Database for PostgreSQL with Veeam Backup for Microsoft 365

$
0
0

How to use Azure Database for PostgreSQL with Veeam Backup for Microsoft 365

KB ID: 4659
Product: Veeam Backup for Microsoft 365 | 8
Published: 2024-09-18
Last Modified: 2024-09-18

Purpose

This article documents how to utilize Azure Database for PostgreSQL to host the Veeam Backup for Microsoft 365 v8 or higher configuration database.

Solution

After deploying Azure Database for PostgreSQL, additional steps must be performed to ensure it can be utilized by Veeam Backup for Microsoft 365.

  1. Manually enable the feature PG_TRGM under azure.extensions.
    The trigram indexes extension is required for Veeam Backup for Microsoft 365 to work with the DB server.
PG_TRGM
  1. Install Veeam Backup for Microsoft 365 using the PostgresSQL instance.
    The installer will generate the 'postgres' database and create the proxy user, to which you will grant the necessary permissions in the next step.
  2. Connect to the PostgreSQL server and run the following query against the 'postgres' database to assign the necessary permissions to the account that will be used by the Veeam Backup for Microsoft 365 Proxy Service.
GRANT azure_pg_admin TO proxy_user_veeambackup365;
To submit feedback regarding this article, please click this link: Send Article Feedback
To report a typo on this page, highlight the typo with your mouse and press CTRL + Enter.

How to Migrate Veeam Backup for Salesforce off CentOS

$
0
0

How to Migrate Veeam Backup for Salesforce off CentOS

KB ID: 4664
Product: Veeam Backup for Salesforce | 3.0
Published: 2024-09-18
Last Modified: 2024-09-18

Purpose

This article documents how to migrate a Veeam Backup for Salesforce (VBSF) deployment from a machine running CentOS 7 to a machine running a supported Linux distro.

Starting in Veeam Backup for Salesforce version 3, CentOS will no longer be supported as a distro for the deployment of Veeam Backup for Salesforce.

Solution

This procedure will guide you through migrating to a new VBSF version 3 deployment on a new server with a supported Linux distro and configuring that new deployment to reuse the product configuration and backup databases from the old deployment.


Before making any changes to the environment, please create a VM-level or disk-level snapshot to ensure you can roll back changes should something go wrong.

Part 1: Prepare the Source Server for Migration

  1. Disable all backup policies.
  2. Ensure that there are no active backup policies or restore jobs.
  3. Stop the backend service:
sudo systemctl stop vbsf-backend

Part 2: Deploy Veeam Backup for Salesforce on New Server

  1. Begin installing VBSF on the target server, but do not open the generated URL of the initial setup wizard.
  2. Stop backend service of target server:
sudo systemctl stop vbsf-backend

Part 3: Migrate Data From the Source Server to the Target Server

  1. If the source server was running VBSF v2, copy the product encryption key from the source server to the target server and overwrite the existing key file.
    Note: The file location and name format are different. You must rename the VBSF v2 key to match the v3 key name and then overwrite the v3 key on the target server with the now renamed v2 key from the source server.
    • VBSF 2.0 location and naming format:
      /opt/vbsf/vbsf-backend.product.key
      
    • VBSF 3.0 location and naming format:
      /opt/vbsf/vbsf-backend/config/product.key
      
    As an example, the key can be migrated using scp from the source server, as shown in the examples below:
sudo scp /opt/vbsf/vbsf-backend.product.key root@10.10.46.64:/opt/vbsf/vbsf-backend/config/product.key
  1. After copying the key from the source server to the target server, run the following commands on the target server to configure file ownership and set the required access for the product key:
sudo chown vbsf:vbsf /opt/vbsf/vbsf-backend/config/product.key
sudo chmod 600 /opt/vbsf/vbsf-backend/config/product.key
  1. Delete https.properties from target server:
sudo rm /opt/vbsf/vbsf-backend/config/https.properties
  1. From the source server, move the contents of the data folder (containing the backed-up files and metadata) to the target server.
    Below are the equivalent folder paths for the past versions:
    • VBSF v1
      /opt/vbsf/vbsf-backup/data/
      
    • VBSF v2
      /opt/vbsf/data/
      
    • VBSF v3
      /opt/vbsf/data/
      
Example Methods to Migrate Data

You can use rsync to copy folders with the following options:

  • -a: archive mode
  • -p: preserve attributes
  • -P: show progress and allow the resumption of partial transfers
  • -q: quiet mode
  • -z: compress files during transfer

If the amount of data is large, you could consider using a cron to overcome timeouts. Using this command you will be prompted to provide the root password for the target server.

Note: This example is based on migrating from a source server using VBSF v2 to a target server running v3. If your source machine is running v1, update the path accordingly.

sudo rsync -apPqz /opt/vbsf/data root@10.10.46.64:/opt/vbsf/data/
Alternatively, if the data size is small, you can simply use scp:
sudo scp -r /opt/vbsf/data root@10.10.46.64:/opt/vbsf/data/
  1. After copying the data folder contents to the target server, run the following command on the target server to configure file ownership and set the required access level for backed-up data:
sudo chown -R vbsf:vbsf /opt/vbsf
sudo chmod -R 755 /opt/vbsf
  1. It is important to connect the existing configuration database to the new installation. Otherwise, you must create backup policies and do a full initial backup for each protected organization. If configuration or backup databases are located on the management server of the source server, you might want to consider exporting those databases to a new location.

    For more information, review:

Part 4: Finalize Migration

  1. Start the backend service on the target VBSF server.
sudo systemctl start vbsf-backend
  1. Update the Salesforce Connected App with the Callback URL of the target installation to allow the installation to connect to Salesforce.
  2. If the PostgreSQL instance is running version 12, you must upgrade it first to a supported version before proceeding.
    For more information, review Veeam KB4665.
  3. Proceed with the initial setup wizard using the URL generated during installation.
    • When connecting to PostgreSQL, make sure to provide the connection details of the migrated configuration databases.
    • Select the “Customize” option to provide the configuration database name.
    • Select “Skip backup policy creation” to configure the connection to backup databases later.
  4. Update the migrated configuration of the product with the address of the new management server.
    Log in with the local administrator account, go to Configuration > About > Advanced Settings, and edit the backend.domain parameter to match the domain name of the target installation.
  5. If the databases were located on the management server and were migrated with the configuration database, you must update the connection details for each backup database under Configuration > Salesforce > Databases.
  6. Enable backup policies
    • Once upgraded, the first run of backup policies will start database migration procedures. These procedures will block any changes to the backup database, and backup policies may report a Failed status.

      Note:
       Do not restart the application/appliance during the database migration, as doing so will result in a corrupted installation and backup repository.
    • Once migration is finished, backup policies will start working normally.
  7. If Single Sign-On with Microsoft Entra ID was configured, the configuration change is required on the Microsoft Entra ID side:
    • In Microsoft Entra ID, go to the App Registration > Authentication section and modify the Redirect URI to match the domain name of the management server.
To submit feedback regarding this article, please click this link: Send Article Feedback
To report a typo on this page, highlight the typo with your mouse and press CTRL + Enter.

How to Upgrade PostgreSQL 12 used by Veeam Backup for Salesforce

$
0
0

How to Upgrade PostgreSQL 12 used by Veeam Backup for Salesforce

KB ID: 4665
Product: Veeam Backup for Salesforce | 3.0
Published: 2024-09-18
Last Modified: 2024-09-18

Purpose

This article documents the procedure for upgrading the PostgreSQL v12 deployment before upgrading Veeam Backup for Salesforce.

Cause

Starting in Veeam Backup for Salesforce v3, PostgreSQL v12 is no longer supported.

Solution

Before beginning the Veeam Backup for Salesforce upgrade, whether that upgrade would be an automated upgrade for supported distros or a manual migrate/upgrade for Centos, PostgreSQL must be upgraded to at least version 13. If the configuration and backup databases are on different servers, then both servers should be upgraded to a supported PostgreSQL version.

  1. Before making any changes to the machine where PostgreSQL is installed, please ensure that a snapshot is created at the VM level or disk level so that should a rollback be needed, it can be performed to start the process over.
  2. Disable all backup policies.
  3. Ensure that there are no active backup policies or restore jobs.
  4. Stop the backend service:
sudo systemctl stop vbsf-backend
  1. Upgrade PostgreSQL to at least v13.
    For more information, see: https://www.postgresql.org/docs/12/upgrading.html
  2. If the PostgreSQL and Veeam Backup for Salesforce deployment are on the same server, and that server is using CentOS, review Veeam KB4664 for information about migrating the Veeam Backup for Salesforce deployment to a support Linux distro.
  3. After the PostgreSQL upgrade, restart the back VBSF backend service:
sudo systemctl start vbsf-backend
  1. If the database connection details were changed during the upgrade, make sure to update the corresponding connection record in the product: 
    • Go to Configuration > Salesforce > Databases and update connection details for each database.
  2. Enable backup policies.
To submit feedback regarding this article, please click this link: Send Article Feedback
To report a typo on this page, highlight the typo with your mouse and press CTRL + Enter.

Release Information for Veeam Backup for Microsoft Azure v7 Patch 1

$
0
0

Release Information for Veeam Backup for Microsoft Azure  v7 Patch 1

KB ID: 4662
Product: Veeam Backup for Microsoft Azure | 7
Published: 2024-09-18
Last Modified: 2024-09-23

Requirements

Please confirm that you are running version Veeam Backup for Microsoft Azure v7 (build 7.0.0.467) or later before upgrading. You can find the currently installed build number (Product version) in the About section under Configuration | Support Information | Updates. After installing Veeam Backup for Microsoft Azure v7 patch 1, your build number will be 7.1.0.22.

What's New

Security and Performance
  • Overall stability and product security has been improved.
  • The FLR process is enhanced to address and prevent potential local privilege escalation, ensuring greater security during operations.
Cost Optimization
  • Enhancements in the usage of Azure Storage Queue service for better cost efficiency.

Resolved Issues

General
  • Unexpected errors occur if Azure VMs have no primary network interface attached.
Backup
  • Under certain circumstances, backup policies fail with the error:
    Crypto key {ID} was not found.
    
  • Application-aware processing for Azure VMs that belong to a subnet with NAT gateway enabled may fail due to the missing ‘Microsoft.Network/natGateways/join/action’ permission.
  • When the private deployment mode is enabled, Veeam Backup for Microsoft Azure disables the ‘Network Policy for Private Endpoints’ setting in the subnet associated with the backup appliance.
  • Under certain circumstances, backup policies fail to perform weekly and monthly backups to immutable repositories.
  • Backup policies fail when processing VMs with ephemeral OS disks.
Restore
  • File-Level Recovery fails with the error:
    Requested operation requires an element of type 'String', but the target element has type 'Object'.
    
  • When the resource group of the virtual network associated with the backed-up Azure VM is changed, the restore operation fails with a 500 error.
Retention
  • The retention policy session fails when the repository is used to store configuration backups.
Upgrade
  • If the appliance VM has certain customized settings, the upgrade process fails with the error:
    Failed to create snapshot of virtual machine.
    
  • If a decimal comma is used instead of a dot for system account settings on the Veeam Backup & Replication server, the backup appliance upgrade fails with the error:
    The input string was not in the correct format.
    

Deployment Information

To install updates, install the latest version of Veeam Backup & Replication that includes the updated plug-in, or manually upgrade the plug-in to version 12.7.1.18. Then, update the appliances as described in section Updating Appliances Using Console of the Veeam Backup for Microsoft Azure User Guide.

Alternatively, follow the instructions in section Installing Updates of the Veeam Backup for Microsoft Azure User Guide.

After installing the patch, your build version will be 7.1.0.22

To submit feedback regarding this article, please click this link: Send Article Feedback
To report a typo on this page, highlight the typo with your mouse and press CTRL + Enter.

Error: ".NET (`dotnet-`) must be added to the blacklist to prevent unattended upgrades that could impact the availability of the Linux proxy."

$
0
0

Error: ".NET (`dotnet-`) must be added to the blacklist to prevent unattended upgrades that could impact the availability of the Linux proxy."

KB ID: 4658
Product: Veeam Backup for Microsoft 365 | 8
Published: 2024-09-19
Last Modified: 2024-09-25

Challenge

Attempting to add a Linux-base proxy in Veeam Backup for Microsoft 365 fails with the error:

Error: .NET (`dotnet-`) must be added to the blacklist to prevent unattended upgrades that could impact the availability of the Linux proxy.
Error

Cause

This error occurs when the proxy deployment process detects that dotnet- has not been excluded from unattended-upgrades.

Per Veeam Backup for Microsoft 365 documentation:

On Linux-based backup proxy servers, unattended-upgrades of .NET can impact a backup proxy server's availability. To prevent unattended-upgrades:

  • On Ubuntu hosts, .NET (dotnet-) must be added to the blacklist.
  • On Red Hat hosts, .NET (dotnet-*) must be added to the excludepkgs list.

Solution

For Ubuntu-based Proxy

  1. Connect to the Ubuntu-based Linux machine via SSH.
  2. Run the following command to confirm that dotnet has not been excluded from unattended-upgrades:
apt-config dump | grep 'Unattended-Upgrade::Package-Blacklist:: "dotnet-\?"'
  1. If no results are shown, run the following command to add "dotnet-"; to the /etc/apt/apt.conf.d/50unattended-upgrades file.
sudo sed -i '/^Unattended-Upgrade::Package-Blacklist {/a\        "dotnet-";' /etc/apt/apt.conf.d/50unattended-upgrades
edit

For RHEL-based Proxy

  1. Connect to the RHEL-based Linux machine via SSH.
  2. Run the following command to confirm that dotnet has not been excluded from unattended-upgrades:
grep '^excludepkgs=.*dotnet-*' /etc/dnf/dnf.conf
  1. If no results are shown,  add the following line to /etc/dnf/dnf.conf file.
excludepkgs=dotnet-*
RHEL
To submit feedback regarding this article, please click this link: Send Article Feedback
To report a typo on this page, highlight the typo with your mouse and press CTRL + Enter.

Proxmox VE Compatibility with Veeam Backup Server OS Server 2012 and 2012 R2

$
0
0

Proxmox VE Compatibility with Veeam Backup Server OS Server 2012 and 2012 R2

KB ID: 4657
Product: Veeam Backup & Replication | 12.2
Published: 2024-09-23
Last Modified: 2024-09-23
Article Applicability
This article is relevant only when the machine where Veeam Backup & Replication is installed uses either Server 2012 or Server 2012 R2.

Challenge

After adding Proxmox VE (PVE) hosts to Veeam Backup & Replication, the workers are deployed, but the testing phase fails with the error:

If the server where Veeam Backup & Replication is installed is running Server 2012:

System.ComponentModel.Win32Exception (0x80090308): The token supplied to the function is invalid

If the server where Veeam Backup & Replication is installed is running Server 2012 R2:

Failed to connect to the worker core service: Failed to connect to the backup appliance

Cause

These errors occur because the CBC-based ciphers that Server 2012 and Server 2012 R2 use for TLS1.2 communication are not supported by PVE.

Solution

Option 1: Upgrade the Windows OS

Upgrade the machine that Veeam Backup & Replication is installed on to Windows Server 2016 or newer.

Recomended, considering both Server 2012 and Server 2012 R2 reached End of Life in October of 2023.


Solution 2: Apply Security Update 3174644

If an upgrade is not feasible, install Security Advisory# 3174644 to the Server 2012/2012 R2 machine where Veeam Backup & Replication is installed.

To submit feedback regarding this article, please click this link: Send Article Feedback
To report a typo on this page, highlight the typo with your mouse and press CTRL + Enter.

Minimum supported OS version for Veeam VSS Hardware Provider is Microsoft Server 2012 (64-bit only).

$
0
0

Minimum supported OS version for Veeam VSS Hardware Provider is Microsoft Server 2012 (64-bit only).

KB ID: 4661
Product: Veeam Backup & Replication | 12.2
Published: 2024-09-25
Last Modified: 2024-09-25

Challenge

An attempt to rescan, upgrade, or update the Veeam Backup Server fails with the error:

Minimum supported OS version for Veeam VSS Hardware Provider is Microsoft Server 2012 (64-bit only).

Cause

This issue occurs because an entry in the Configuration Database causes the Veeam Backup & Replication software to believe an outdated version of the Veeam VSS Hardware Provider package is deployed on the Veeam Backup Server and needs to be updated. However, upgrading this component package is impossible because the Veeam Backup Server is running Windows 10 or 11, and the Veeam VSS Hardware Provider component only supports deployment on Windows Server editions.

For a causal example, please review the More Information section.

Solution

To remove the conflicting entry from the Configuration Database, perform the following steps:

  1. On the Veeam Backup Server, open an Administrative PowerShell console. (Win+X, tap 'A')
  2. Run the following command:
    The command will query the components assigned to the Veeam Backup Server, look for the Veeam VSS Hardware Provider, and remove it from being assigned to the Veeam Backup Server.
((Get-VBRLocalhost).FindPhysicalHost().GetComponents() | Where Type -eq VssHwSnapshotProvider).Delete() 
After the entry is removed, Veeam Backup & Replication will no longer attempt to deploy the unsupported package on the Veeam Backup Server.

More Information

Case Example

Based on the limited cases where this issue has been reported, it appears the sequence of events that causes this latent erroneous entry in the Configuration Database to exist is as follows:

  1. Veeam Backup & Replication was initially deployed on Windows Server OS.
  2. A Configuration Backup was created.
  3. Veeam Backup & Replication was redeployed on Windows 10 or Windows 11.
  4. A Configuration Restore to the new Veeam Backup Server was performed using the configuration backup from the initial server.
  5. During the Configuration Restore, the entries within the hostscomponents table are restored, including the entry that indicates that the Veeam VSS Hardware Provider package is deployed on the Veeam Backup Server.
  6. After the Configuration Restore, everything appears operational until an upgrade or update occurs, which causes the Veeam Backup & Replication software to reassess what packages are deployed. At which point the entry in the hostscomponents table causes the Veeam Backup & Replication software to attempt to deploy the Veeam VSS Hardware Provider package on the Veeam Backup Server. The deployment fails, and the package installer throws the error:
    Minimum supported OS version for Veeam VSS Hardware Provider is Microsoft Server 2012 (64-bit only)
    
To submit feedback regarding this article, please click this link: Send Article Feedback
To report a typo on this page, highlight the typo with your mouse and press CTRL + Enter.

Build Numbers and Versions of Veeam Backup for Nutanix AHV

$
0
0

Build Numbers and Versions of Veeam Backup for Nutanix AHV

KB ID: 4299
Product: Veeam Backup for Nutanix AHV | 2.0 | 2.1 | 3.0 | 4.0 | 5.0 | 5.1 | 6
Veeam Availability for Nutanix AHV | 1.0
Published: 2022-04-13
Last Modified: 2024-09-26

This KB article lists all versions of Veeam Backup for Nutanix AHV and their respective build numbers.

For more information on downloading the latest version of Veeam Backup for Nutanix AHV, visit:

Starting with the release of Veeam Backup & Replication 12.1, the What's New information for integrated products, like Veeam Backup for Nutanix AHV, is included in the Veeam Backup & Replication What's New PDF.
Note: Prior to version 2.0, the product was known as Veeam Availability for Nutanix.
Version Build Number Plug-In Build Release Date Release Notes
Veeam Backup for Nutanix AHV 6 Releases
Veeam Backup for Nutanix AHV 6.1 6.1.0.14 12.6.1.15 2024-09-26 KB4668
Veeam Backup for Nutanix AHV 6 6.0.0.1228 12.6.0.632 2024-08-24 HTML
Veeam Backup for Nutanix AHV 5 Releases
Veeam Backup for Nutanix AHV 5.1 5.1.0.7 12.5.1.8 2023-12-05 KB4521
Veeam Backup for Nutanix AHV 5 5.0.0.1080  12.5.0.465  2023-09-27 PDF
Veeam Backup for Nutanix AHV 4 Releases
Veeam Backup for Nutanix AHV 4a 4.0.1.18  12.1.4.5 2023-04-19 KB4426
Veeam Backup for Nutanix AHV 4 4.0.0.1899 12.0.4.1020 2023-02-14 PDF
Veeam Backup for Nutanix AHV 3a Releases
Veeam Backup for Nutanix AHV 3a 3.1.36 11.1.3.33 2022-01-18 KB4272
Veeam Backup for Nutanix AHV 3 3.0.775 11.0.3.819 2021-09-24

PDF

KB4214

Veeam Backup for Nutanix AHV 2 Releases
Veeam Backup for Nutanix AHV 2.1 2.1.396   2021-02-24

PDF

KB4117

Veeam Backup for Nutanix AHV 2 2.0.558   2020-03-24

PDF

KB3133

Veeam Availability for Nutanix 1 Releases
Veeam Availability for Nutanix 1.0 U3 1.0.829   2019-10-09 KB3013
Veeam Availability for Nutanix 1.0 U2 1.0.632   2019-05-30 KB2956
Veeam Availability for Nutanix 1.0 U1 1.0.457   2018-11-30  
Veeam Availability for Nutanix 1.0 1.0.342   2018-07-26  
Swipe to show more of the table
To submit feedback regarding this article, please click this link: Send Article Feedback
To report a typo on this page, highlight the typo with your mouse and press CTRL + Enter.

Granular sudo Permissions Required for Hardened Repository

$
0
0

Granular sudo Permissions Required for Hardened Repository

KB ID: 4667
Product: Veeam Backup & Replication | 12.2
Published: 2024-09-26
Last Modified: 2024-09-26

Purpose

This article documents the granular sudo permissions required to allow Veeam Backup & Replication to deploy and manage a Hardened Repository.

Solution

Account Requirements

  • The Linux user account used by Veeam Backup & Replication to deploy and manage the Hardened Repository must use the bash shell.
  • The Linux account used for a Hardened Repository must be a non-root account with root-equivalent permissions (sudo). Some administrators may prefer to restrict the account used by Veeam Backup & Replication to only be able to execute specific commands using sudo on the target Linux machine. (See example below.)

Granular Sudoer Drop-In Example

The example sudoers drop-in file below is compatible with all supported Linux distributions.

The example provided includes entries for the package managers of all supported Linux distributions. To further restrict sudoer permissions comment out or remove the lines for package managers not in use by the Linux distribution in use by the Hardened Repository.

  • Debian/Ubuntu — Remove lines 17-23.
  • SLES/openSUSE — Remove lines 17-21 and 24-25.
  • RHEL/AlmaLinux/Rocky Linux/Oracle Linux — Remove lines 22-25.
Example /etc/sudoers.d/veeamsvc file:
#MISC
veeamsvc ALL=(ALL) /bin/whoami
veeamsvc ALL=(ALL) /bin/uname
veeamsvc ALL=(ALL) /bin/ls
veeamsvc ALL=(ALL) /bin/test

#CHECK DISTRO
veeamsvc ALL=(ALL) /bin/find /opt/veeam/deployment -type d
veeamsvc ALL=(ALL) /bin/find /opt/veeam/deployment -type f -not -path /opt/veeam/deployment/veeamdeploymentsvc

#Services
veeamsvc ALL=(ALL) /opt/veeam/deployment/veeamdeploymentsvc
veeamsvc ALL=(ALL) /opt/veeam/transport/veeamtransport
veeamsvc ALL=(ALL) /opt/veeam/transport/veeamtransport-link

#Package Management
veeamsvc ALL=(ALL) /bin/rpm --import /tmp/*
veeamsvc ALL=(ALL) /bin/rpm --install /tmp/veeamdeployment*
veeamsvc ALL=(ALL) /bin/rpm --erase veeamdeployment
veeamsvc ALL=(ALL) /bin/yum --assumeyes --errorlevel=0 install /tmp/*
veeamsvc ALL=(ALL) /bin/yum --assumeyes --errorlevel=0 remove veeamdeployment
veeamsvc ALL=(ALL) /usr/bin/zypper --terse --non-interactive --no-gpg-checks install --auto-agree-with-licenses --force-resolution /tmp/veeamdeployment*
veeamsvc ALL=(ALL) /usr/bin/zypper --terse --non-interactive --no-gpg-checks remove veeamdeployment
veeamsvc ALL=(ALL) /usr/bin/dpkg --force-confold --install /tmp/*
veeamsvc ALL=(ALL) /usr/bin/dpkg --purge veeamdeployment

#Assign Permissions
veeamsvc ALL=(ALL) /bin/chown -hR root /opt/veeam/deployment
veeamsvc ALL=(ALL) /bin/chmod 755 /opt/veeam/
veeamsvc ALL=(ALL) /bin/chmod 755 /opt/veeam/deployment
veeamsvc ALL=(ALL) /bin/chmod 755 /opt/veeam/deployment/ca-trusted
veeamsvc ALL=(ALL) /bin/chmod 755 /opt/veeam/deployment/scripts
veeamsvc ALL=(ALL) /bin/chmod 644 /opt/veeam/deployment/ca-trusted/*
veeamsvc ALL=(ALL) /bin/chmod 644 /opt/veeam/deployment/libVeeamDeploymentDll.so
veeamsvc ALL=(ALL) /bin/chmod 644 /opt/veeam/deployment/scripts/veeamdeployment
veeamsvc ALL=(ALL) /bin/chmod 644 /opt/veeam/deployment/scripts/veeamdeployment.service
veeamsvc ALL=(ALL) /bin/chmod 644 /opt/veeam/deployment/VeeamDeploymentConfig
veeamsvc ALL=(ALL) /bin/chmod 744 /opt/veeam/deployment/veeamdeploymentsvc

#RM
veeamsvc ALL=(ALL) /bin/rm -rf /opt/veeam/deployment
veeamsvc ALL=(ALL) /bin/rm /etc/veeam/immureposvc/timeLog
veeamsvc ALL=(ALL) /bin/rm /etc/veeam/immureposvc/retainLock
veeamsvc ALL=(ALL) /bin/rm /etc/veeam/immureposvc/config
veeamsvc ALL=(ALL) /bin/rmdir /etc/veeam/immureposvc

#Set Immutablility
veeamsvc ALL=(ALL) /bin/chattr -i /etc/veeam/immureposvc/timeLog
veeamsvc ALL=(ALL) /bin/chattr -i /etc/veeam/immureposvc/retainLock
veeamsvc ALL=(ALL) /bin/chattr -i /etc/veeam/immureposvc/config

#Process Management
veeamsvc ALL=(ALL) /usr/bin/fuser /var/lib/dpkg/lock-frontend
veeamsvc ALL=(ALL) /usr/bin/fuser /var/lib/dpkg/lock

More Information

The following command can be used to validate the sudoers drop-in file:
sudo visudo -cf /etc/sudoers.d/veeamsvc
To submit feedback regarding this article, please click this link: Send Article Feedback
To report a typo on this page, highlight the typo with your mouse and press CTRL + Enter.

Release Information for Veeam Backup for Nutanix AHV 6.1

$
0
0

Release Information for Veeam Backup for Nutanix AHV 6.1

KB ID: 4668
Product: Veeam Backup for Nutanix AHV | 6
Published: 2024-09-26
Last Modified: 2024-09-26

Requirements

To upgrade to Veeam Backup for Nutanix AHV 6.1, download the installer below and run it on the Veeam Backup & Replication server that manages the AHV Backup Appliance(s). The Veeam Backup for Nutanix AHV 6.1 Plug-In must be installed before updating the Nutanix AHV Backup Appliance.

You can check the AHV Backup Appliance Version by clicking the gear icon at the top-right corner of the AHV Backup Appliance web console and selecting the Appliance Settings tab.

After updating the Nutanix AHV Backup Appliance, the version number will be 6.1.0.14.

Veeam Backup for Nutanix AHV 6.1 only supports integration with Veeam Backup & Replication version 12.2.

Resolved Issues

  • Resolved timeout issues introduced in Veeam Backup for Nutanix AHV 6.0 that occured between the AHV appliance and Veeam Backup & Replication server.
  • Fixed Protection Domain backup job failures.
  • Improved UI job session error messages when the Nutanix cluster lacks the required iSCSI services IP definition.
  • Corrected an issue where the backup job storage optimization and compression settings were incorrectly saved in the Veeam Backup & Replication UI.
  • Addressed a mismatched certificate thumbprint condition between the AHV appliance and Nutanix cluster.
  • Fixed an issue with the upgrading Veeam Backup for Nutanix AHV v5.x appliances, caused by the password hashing method.
  • Resolved intermittent Nutanix API processing failures due to cluster load or other transient conditions.

Download Information

The Veeam Backup for Nutanix AHV 6.1 installer contains both the Nutanix AHV Plug-in 12.6.1.15 and the AHV Backup Appliance 6.1.0.14.
To submit feedback regarding this article, please click this link: Send Article Feedback
To report a typo on this page, highlight the typo with your mouse and press CTRL + Enter.

"There is no FIB [summary.xml]" error with Veeam Cloud Connect v12.2

$
0
0

"There is no FIB [summary.xml]" error with Veeam Cloud Connect v12.2

KB ID: 4655
Product: Veeam Backup & Replication | 12.2
Published: 2024-09-10
Last Modified: 2024-10-01
Updated Hotfix Release — September 30, 2024

On 2024-09-30, a new revision to the hotfix package listed in this article was released. This updated hotfix file coincides with a repackaged release of the Veeam Backup & Replication 12.2 ISO dated 20240926, which integrates the new hotfix package during the v12.2 upgrade/deployment.

Service Providers wishing to use the Remote Console functionality with tenants that have upgraded or deployed Veeam Backup & Replication using the new 12.2 ISO, dated 20240926, must have the new hotfix from this article installed, as well as the updated plugins for Veeam Backup for Microsoft Azure and Veeam Backup for Nutanix AHV.

All Service Providers who have previously installed the older hotfix and plan to use the Remote Console functionality with their tenants are advised to apply this updated hotfix on both their VCC server and their tenant's VBR 12.2 server.

Service Provider-side Issue
This error results from an issue with Veeam Cloud Connect deployed in the Service Provider's environment. Tenants impacted by this issue are advised to contact their Service Provider directly, and Service Providers will contact Veeam Support. Due to the scope of this issue, Veeam Support will be unable to assist tenants in resolving it.

Challenge

In Veeam Cloud Connect v12.2 (build 12.2.0.334), deployed from an ISO dated before 20240926, a network connection drop between the Veeam Cloud Connect server and the Cloud Gateway in the service provider’s infrastructure may cause a tenant's  job targeting a Cloud Repository to begin failing with the error:

There is no FIB [summary.xml] in the specified restore point. Failed to restore file from local backup.
Error

Solution

This resolution section has been expanded to cover different variations of scenarios that Service Providers may face. As with all Veeam KB Articles, this article will be updated as more information and improved resolution steps become available.

This article utilizes expandable sections for each scenario to ensure readers can find the information they need efficiently.


Expand the section below that represents your situation.

Upgraded to VCC v12.2 and Tenants Are Impacted

Service Providers operating Veeam Cloud Connect v12.2 (build 12.2.0.334) that have tenants reporting that their jobs have failed are advised to perform the following steps to remediate their situation.

  1. Download the Hotfix and Remediation Scripts.
  2. Extract the hotfix package to a folder on the Veeam Cloud Connect server.
  3. Switch the SP backup server to the Maintenance mode.
  4. Once all tenant jobs have stopped or been completed, disable all tenant accounts.
  5. On the machine where Veeam Cloud Connect is installed, run veeam_backup_12.2.0.334_PrivateFix_TF787128.exe.

    Note:
     The hotfix installer may require a reboot after installation is complete. Please plan accordingly.
  6. Create a backup of the configuration database.
  7. Extract the Remediation Scripts package and identify the SQL script applicable to the database engine hosting the configuration database.
    • For Microsoft SQL Server 2012 or 2014, use DeletingStorageswithoutFIB_MSSQL2012-2014.txt
    • For Microsoft SQL Server 2016 or higher, use DeletingStorageswithoutFIB_MSSQL2016+.txt
    • For PostgreSQL, use DeletingStorageswithoutFIB_PG.txt
  8. Open the appropriate database management software and connect the SQL server hosting the Veeam Cloud Connect configuration database.
    For information about identifying the location of the VCC configuration database, review the Identify Veeam Database Location section of Veeam KB1471.
  9. Use the SQL script to repair the Configuration Database.
    1. Paste the contents of the appropriate DeletingStorageswithoutFIB script into a new SQL query.
      • For SSMS, right-click on the database, select “New query,” then paste the text from the script file.
      • For pgAdmin, right-click on the database, select “Query Tool,” then paste the text from the script file.
    2. Execute the script against the Veeam Cloud Connect Configuration Database
    3. Review the message output and collect the list of deleted storage for later use.
    4. Repeat the previous two steps (9b and 9c) until the script output reports no storages were deleted (0 rows affected).
  10. Using the list of deleted storages you collected in Step 9c, locate and remove those storages from the cloud repositories.
    You may proceed without completing this step right away. Please remember to perform this cleanup step at a later time.
    Those storages will remain in the repository until they are manually cleaned up.
  11. Enable the tenant accounts that were disabled in Step 4.
  12. Switch the SP backup server to normal operational mode.
  13. Notify all active tenants to first rescan the Service Provider and then start their jobs.

    Failure to rescan first will not directly affect the jobs; the rescan simply ensures that tenants will not have latent restore point entries for partial restore points that were cleaned up as part of Step 9.
Upgraded to VCC v12.2 and Tenants Are Not Reporting Issues

Service Providers operating Veeam Cloud Connect v12.2 (build 12.2.0.334) that have no tenants reporting that there jobs have failed are advised to download and install the hotfix as soon as possible to prevent any occurrences of this issue.

  1. Download the Hotfix.
  2. Extract the hotfix package to a folder on the Veeam Cloud Connect server.
  3. Switch the SP backup server to the Maintenance mode.
  4. On the machine where Veeam Cloud Connect is installed, run veeam_backup_12.2.0.334_PrivateFix_TF787128.exe.

    Note: The hotfix installer may require a reboot after installation is complete. Please plan accordingly.
  5. Switch the SP backup server to normal operational mode.

This hotfix will ensure that should network connection drops occur, they will not impact tenants’ jobs.

Planning to Upgrade to Veeam Cloud Connect 12.2

The issue documented in this article only occurs when Veeam Cloud Connect 12.2 was deployed with ISOs named either:

  • VeeamBackup&Replication_12.2.0.334_20240824.iso
  • VeeamBackup&Replication_12.2.0.334_20240913.iso

On 2024-09-30, a new repackaged ISO for Veeam Backup & Replication was released that included the hotfix for this issue. This means if Veeam Cloud Connect is upgraded using VeeamBackup&Replication_12.2.0.334_20240926.iso, this issue will not occur.

  1. Download the latest Veeam Backup & Replication ISO.
  2. Follow the usual upgrade procedure.

Download Information

Remote Access Console to Tenant's Backup Server

As Remote Access Console requires that the version of Veeam Backup & Replication on both the Service Provider and Tenant sites must be the exact same version, this hotfix should be deployed to the tenant's Veeam Backup & Replication server if there is a need to utilize the Remote Access Console with that tenant.

Note: If the tenant has upgraded to Veeam Backup & Replication v12.2 using the ISO dated 20240926 or higher, this hotfix does not need to be deployed to the tenant's server, as it was included with that repack of the v12.2 ISO.

DOWNLOAD Hotfix

Updated: 2024-09-30

MD5: 581C53BE13D5CCD909B418D912B39A0C
SHA1: 14CC8E76C92B61C645338D7B3AC3A91707BD73A6

Reboot May Be Required

Please note that a reboot may be required after installing the hotfix.

Please plan accordingly.

DOWNLOAD remediation scripts

Updated: 2024-09-13

MD5: 50227D39B9A2D3F09A66D0949958E88D
SHA1: 7A12E535C059454BA4DBC417D2E69894C5BB0D6E

Deployment Validation

As this is a hotfix, the build number of the software will not change. As such, validating the hotfix has been deployed requires checking the hash value of the files present on the system and comparing them to the known hash values of the files included in the hotfix.

Default path to DLLs: C:\Program Files\Veeam\Backup and Replication\Backup\

Filename SHA1 Hash
Veeam.Backup.Common.dll 2A42CEC913B0361341FFB84D4CE0A4DCAA26C628
Veeam.Backup.Core.dll 5CD2BA4D834B92173314BDB324567D1C040AFED3
Veeam.Backup.Model.dll 1646E44D93FFA35125E834C8190A14F118039C05
Swipe to show more of the table

Check Existing File's Hash

To check the hash value of an existing file, use the following PowerShell command with the correct path to the file being checked.

Get-FileHash -Path <file-path> -Algorithm SHA1

Example:

Get-FileHash -Path 'C:\Program Files\Veeam\Backup and Replication\Backup\Veeam.Backup.Common.dll' -Algorithm SHA1
To submit feedback regarding this article, please click this link: Send Article Feedback
To report a typo on this page, highlight the typo with your mouse and press CTRL + Enter.

Granular sudo Permissions for Management of Veeam Agent for IBM AIX

$
0
0

Granular sudo Permissions for Management of Veeam Agent for IBM AIX

KB ID: 4673
Product: Veeam Backup & Replication | 12.2
Veeam Agent for IBM AIX | 4.5
Published: 2024-10-11
Last Modified: 2024-10-15

Purpose

This article provides examples of granular ‘sudo’ configuration for the Linux account that will be used by Veeam Backup & Replication when managing Veeam Agent for IBM AIX deployments with a Protection Group.

Solution

The following granular sudo permissions were tested with Veeam Agent for IBM AIX 4.5 and Veeam Backup & Replication 12.2.
#MISC
veeamdep ALL=(root) /usr/bin/whoami

#MKDIR
veeamdep ALL=(root) /usr/bin/mkdir -p /opt/veeam

#RM
veeamdep ALL=(root) /usr/bin/rm /opt/veeam/veeaminstaller_aix_ppc64
veeamdep ALL=(root) /usr/bin/rm -f /tmp/VeeamAgentAix-*-ppc64.tar
veeamdep ALL=(root) /usr/bin/rm /tmp/VeeamAgentAix-*-ppc64.tar
veeamdep ALL=(root) /usr/bin/rm /tmp/VeeamAgent-*-ppc64.rpm
veeamdep ALL=(root) /usr/bin/rm /tmp/mlocate-*.ppc.rpm
veeamdep ALL=(root) /usr/bin/rmdir /opt/veeam/Upload
veeamdep ALL=(root) /usr/bin/rmdir /opt/veeam

#DEPLOYMENT INSTALL RESCAN
veeamdep ALL=(root) /usr/bin/csum -h MD5 /opt/veeam/veeaminstaller_aix_ppc64
veeamdep ALL=(root) /usr/bin/touch /opt/veeam/veeaminstaller_aix_ppc64
veeamdep ALL=(root) /usr/bin/chmod 0750 /opt/veeam/veeaminstaller_aix_ppc64
veeamdep ALL=(root) /usr/bin/cp -f /home/veeamdep/* /opt/veeam/veeaminstaller_aix_ppc64
veeamdep ALL=(root) /usr/bin/chown root* /opt/veeam/veeaminstaller_aix_ppc64
veeamdep ALL=(root) /opt/veeam/veeaminstaller_aix_ppc64 system-info --format VBR
veeamdep ALL=(root) /opt/veeam/veeaminstaller_aix_ppc64 agent-version
veeamdep ALL=(root) /opt/veeam/veeaminstaller_aix_ppc64 check-package-name --name VeeamAgent
veeamdep ALL=(root) /usr/bin/gunzip /tmp/VeeamAgentAix-*-ppc64.tar.gz
veeamdep ALL=(root) /usr/bin/tar -tf /tmp/VeeamAgentAix-*-ppc64.tar
veeamdep ALL=(root) /usr/bin/sh -c cd /tmp && tar -xf /tmp/VeeamAgentAix-*-ppc64.tar
veeamdep ALL=(root) /opt/veeam/veeaminstaller_aix_ppc64 install-packages --packages /tmp/VeeamAgent-*-ppc64.rpm
veeamdep ALL=(root) /opt/veeam/veeaminstaller_aix_ppc64 update-packages --packages /tmp/VeeamAgent-*-ppc64.rpm
veeamdep ALL=(root) /opt/veeam/veeaminstaller_aix_ppc64 remove-packages --packages VeeamAgent

#VEEAMCONFIG
veeamdep ALL=(root) /usr/sbin/veeamconfig vbrcmd print --agentInfo
veeamdep ALL=(root) /usr/sbin/veeamconfig --stdin
To submit feedback regarding this article, please click this link: Send Article Feedback
To report a typo on this page, highlight the typo with your mouse and press CTRL + Enter.
Viewing all 4508 articles
Browse latest View live


<script src="https://jsc.adskeeper.com/r/s/rssing.com.1596347.js" async> </script>