How to Install, Change, or Remove the Veeam ONE License
Purpose
This article documents how to manually install, change, or remove a license for Veeam ONE.
Solution
Install License
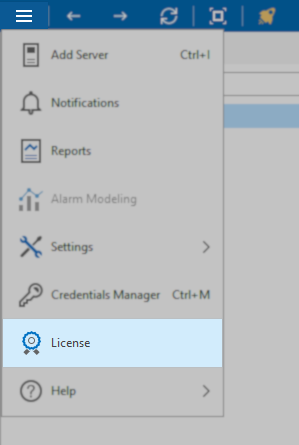
- Open Veeam ONE Client.
- Click the Main Menu (≡) in the top-left corner.
- Click License.

- In the dialog window that appears, click Install License.
- Using the file selector window that appears, navigate to and select the license file.
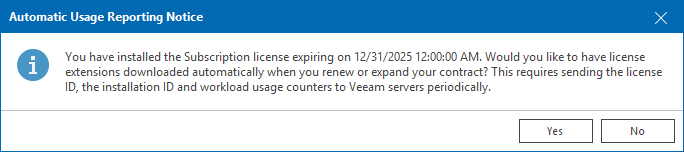
- After supplying a license, you may be prompted to confirm whether the software should automatically check for license updates.
Change License
Install or Update License
For more information about Installing a license and the Update License function, please review:
Veeam ONE Deployment Guide > Updating License
- Open Veeam ONE Client.
- Click the Main Menu (≡) in the top-left corner.
- Click License.
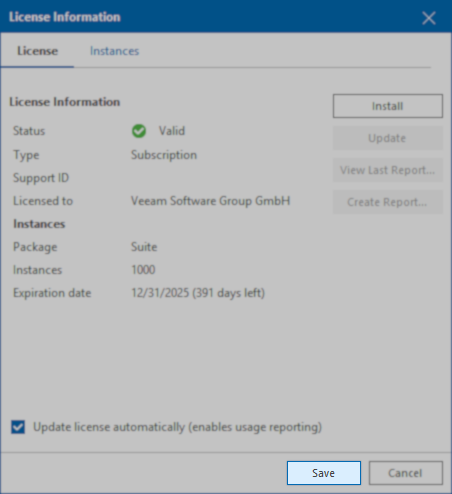
- In the License Information window, click the Install button.
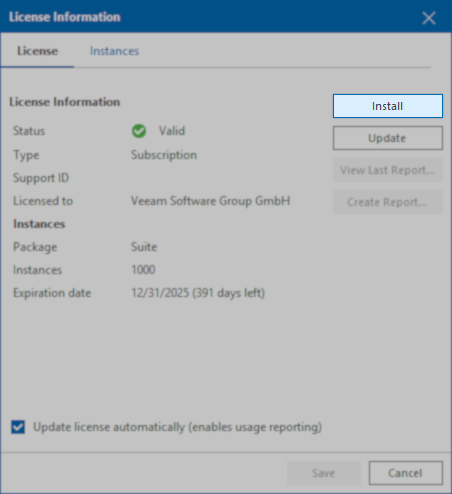
- Using the file selector window that appears, navigate to and select the license file you would like Veeam ONE to use.
- After you have selected the new license file, click Save.
Remove License
License Expiration
For more information regarding License Expiration, please review:
Veeam ONE Deployment Guide > License Expiration
Veeam ONE Deployment Guide > License Expiration
While it is uncommon for a scenario to arise where the license must be removed from Veeam ONE, it can be done. Removing the license from Veeam ONE will revert it to the Community Edition feature set. The Veeam ONE license can only* be removed using REST API.
*If the Veeam ONE server is managed from a Veeam Service Provider Console, the license can be removed remotely.
The steps below will demonstrate how to remove the license using the built-in Swagger UI.
- On the Veeam ONE server, open a web browser and go to https://localhost:1239/swagger/index.html
- Authorize by following Step 1 and Step 2 on this page: Veeam ONE REST API Reference - Getting Authorization Tokens
Note: Read step 2 of the Getting Authorization Token guide very carefully. - Once Authorized, expand the Licensing section and expand the entry named:
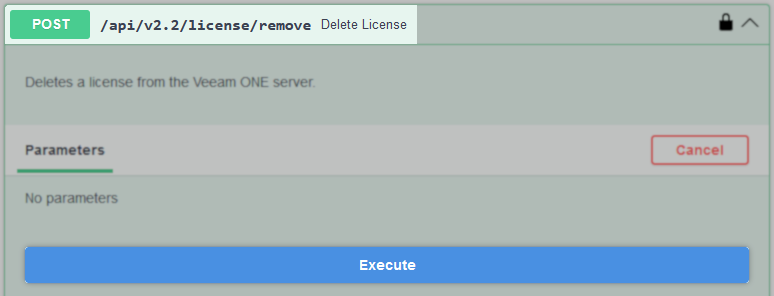
POST /api/v2.2/license/remove Delete License - Click the "Try it out" button.

- Then, click the "Execute" button.
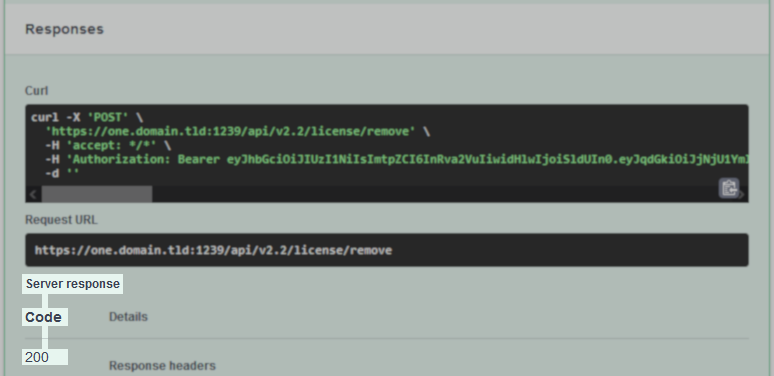
After clicking Execute, the page will update to display a "Server response."
If it returns Code 200, the license was removed successfully.
If you received server response 401 Unauthorized, the authentication and authorization process was not completed correctly. Click Authorize at the top of the Swagger UI page, log out and try again.
To submit feedback regarding this article, please click this link: Send Article Feedback
To report a typo on this page, highlight the typo with your mouse and press CTRL + Enter.
To report a typo on this page, highlight the typo with your mouse and press CTRL + Enter.