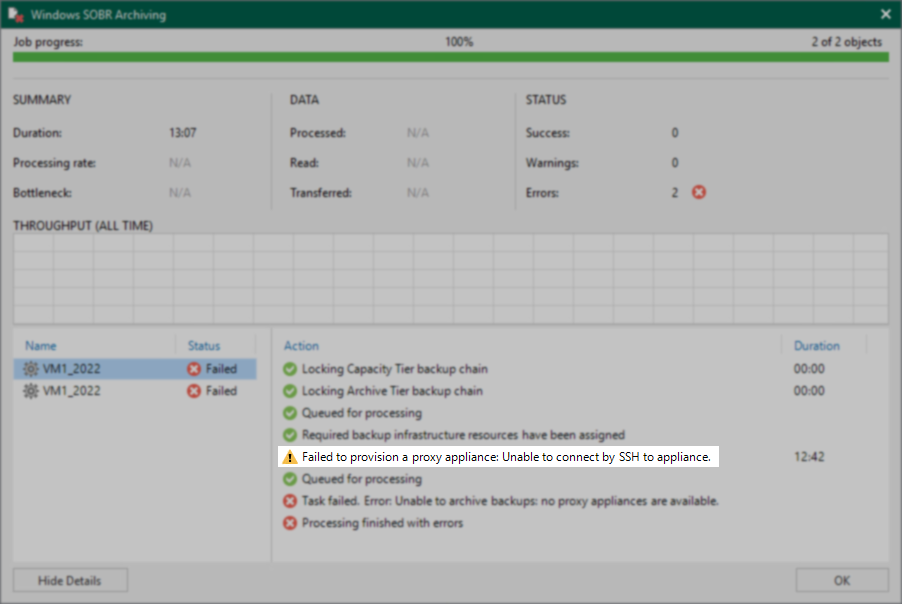
Archiving Job Fails With: "Failed to provision a proxy appliance : Unable to connect by SSH to Appliance."
| KB ID: | 4320 |
| Product: | Veeam Backup & Replication | 11 |
| Published: | 2022-06-14 |
| Last Modified: | 2022-06-14 |
Challenge
Failed to provision a proxy appliance: Unable to connect by SSH to Appliance.
Cause
This issue most commonly occurs when the Firewall or Security groups in AWS/Azure have blocked port 22.
This issue may also occur if an outbound Firewall rule for the environment has blocked port 22.
Solution
Check Firewall Configuration
Review the Used Ports: Archive Object Storage Repository section of the Veeam Backup & Replication User Guide. Confirm that necessary Firewall and Security Group settings have been configured to ensure communication.
Isolation Test Guide
This section provides a step-by-step guide on performing isolation testing to determine if the Port 22 of the Archive Proxy Appliance can be reached.
Note: This process will start all offload/archiving jobs. The offload is started because the appliance is non-persistent and only exists during the archive tier task. Please take this into account and run this after production hours if needed. The IP of the Archive Proxy Appliance is assigned from the Archive Tier Properties under Subnet Settings.
- Assign a specific Windows server as the Gateway Server for the Archive Tier's Object Storage Repository.
This is done so you know which server to perform the isolation test from in the later steps.- Edit the Object Storage Repository assigned as the Archive Tier for the Scale-Out Backup Repository.
- Select the Account Tab ( S3 Glacier | Azure Archive ).
- On the Account tab, enable "Use the following gateway server:"
- Assign a Windows server that can connect to the Cloud Storage.
The server you select as the Gateway Server is the one from which you will run the test in Step #.
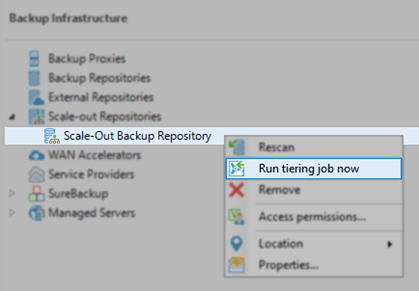
- Force the Tiering Job to start.
This is done because the Archive Tiering Appliance is non-persistent and only exists when an Archiving Task occurs.- Hold the Ctrl key on the keyboard and right-click on the Scale-Out Backup Repository.
- In the context menu, select "Run tiering job now"

- Identify the IP address of the Archiving Job's Proxy Appliance(s).
- Connect to the Gateway Server you assigned in Step# 1 and perform the Isolation Test.
This will isolate whether the communication issue is a problem within Veeam Backup & Replication or the environment itself.
- Connect the Gateway Server
- Open an Administrative PowerShell WindowTip:
1. Right-Click the Start button
2. Tap the "a" key
3. Tap the left arrow key
4. Hit the spacebar - Run the following command:
Replacing <app_IP> with the Proxy Appliance's Public IP
Test-NetConnection -ComputerName "<app_ip>" -Port 22Reviewing Results
- If the Isolation Test successfully contacted Port 22 of the Proxy Appliance, but the Archiving job still fails, please collect logs and open a support case with Veeam.
- If the Isolation Test failed and the Arching Job failed, investigate the network connection between the Gateway and the Proxy Appliance.
- Check local machine's outbound Firewall rules.
- Check the outbound Firewall rules of the network Firewall.
- Check the Security Group settings.
To report a typo on this page, highlight the typo with your mouse and press CTRL + Enter.

